
As a group of preschool girls entered into our redecorated pink/black living room you would assume that they were here to celebrate my daughter's 4th birthday. But I, and my family, knew that this party was for me. I am a Barbie lover at heart and from the moment my daughter announced that she wanted a Barbie themed birthday party my mind hasn't slowed down. It was no secret that I was equally, if not more, excited for this party as my daughter.
I love how the decorations turned out but I also loved that almost all of it was upcycled from materials I already had around the house and was therefore incredibly inexpensive compared to previous birthday parties. However, I will admit that I have a very well stocked craft room and 3 daughters who own plenty of pink.
One of the things I remember most from my childhood Barbie party was playing 'pin the earring on the Barbie'. The main difference between this one and that one is that I used page ripped out of a Barbie coloring book. Also, I feel the need to stress that although my daughter's Barbie party may be more 'updated', it is in no way better than the one I had as a child because my childhood party was awesome.
GAME - PIN THE EARRING ON THE BARBIE

I already had this pink frame and used some silver sequin fabric from my scrap pile to create the base. I printed out a silhouette and cut it out of black card-stock and used some adhesive rhinestone trim for a necklace and a scrapbook bow in her hair. Price - free (entirely upcycled)

I did 'splurge' and get a 3-pack of adorable sleep masks I found at our local hobby lobby for the girls to wear as a blindfold. I also had my daughter pick out large rhinestone stickers to use for the 'earrings'. Price - $5ish (with a 40% off coupon, of course)
DECORATIONS

I rummaged through my daughter's Barbie shoe collection she got weeks earlier for her birthday and 'borrowed' three pairs of shoes. I found these three small frames for $1 each at Michaels and used glittery silver/pink/black craft paper I already had. Price - $3

I mounted glittery craft paper in an extra frame I had. I hot glued some rhinestone trim and used it to display a barbie outfit I purchased for $5. Price - $5

To create this paper garland backdrop I used a 1.5" circle cutter and punched circles out of 8 pieces of 12x12 card stock. I spread all the colors around attempting to 'shuffle' them. I then just started feeding them into my sewing machine one by one (don't try to make a pattern, random is much quicker and I think it looks better). It might seem labor intensive but once the circles were cut, sewing them together took about 10 minutes from start to finish (and that included replacing an empty bobbin). Then I just measured how long I wanted each strip and cut the long strand into sections.
**TIP - The paper garland also is great for gift wrapping - it looks wonderful around a solid wrapping paper or kraft paper.**
I also already had these apothecary jars and the pink Styrofoam glitter balls. I did purchase one bag of the black that was about $4.
BARBIE BOX

My favorite part of the party was the giant Barbie box photo booth. We used a small clothing rack for the girls to use for dress up and then take pictures in the Barbie box. I used a grand wardrobe box from Uhaul ($12), painted it with leftover paint from refinishing my armoire and I lined the inside with polkadot wrapping paper I already had. Price - $12
FAVORS

Handmade Barbie silhouette sugar cookies. I followed this tutorial from SweetAmbs for the icing transfers.

Barbie purses
Digital printout purchased from HERE on Etsy. Price - $3.50

The purses were the perfect size for a sugar cookie and a little DIY bracelet set (pink/black/white beads and a elastic cord).
CAKE AND ICE CREAM

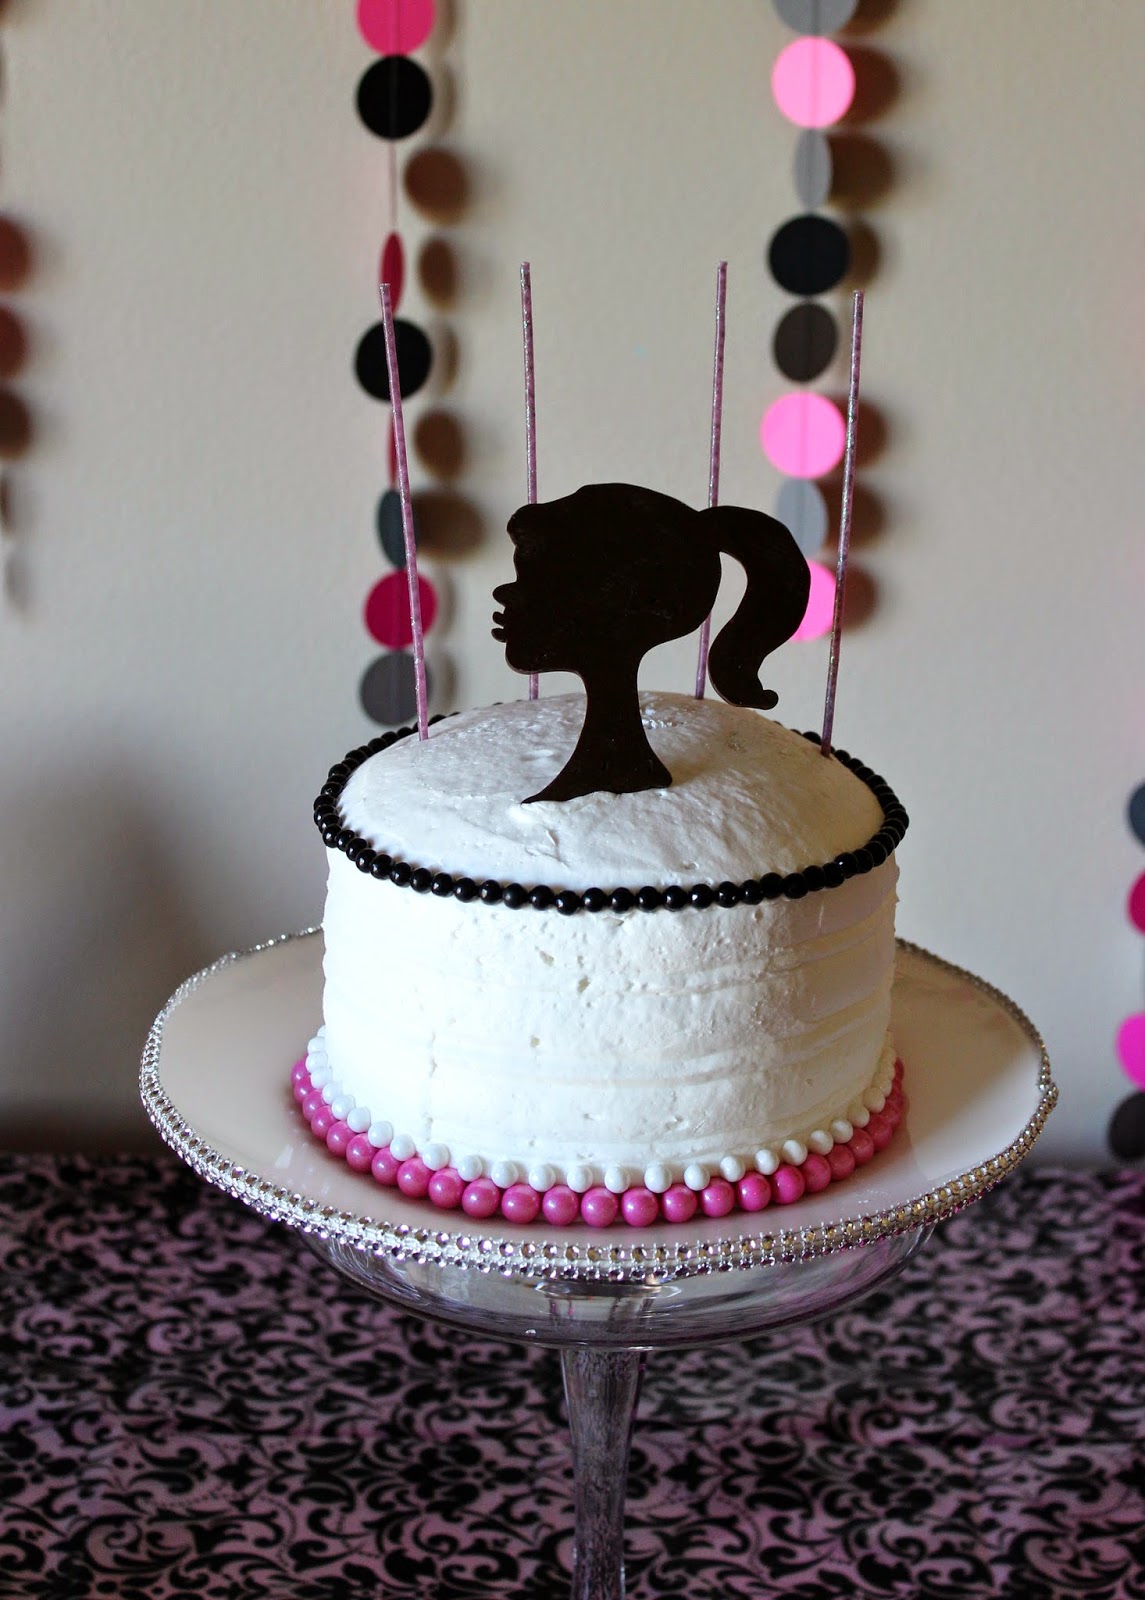
I kept the cake pretty simple, possibly too simple. Whenever I showed it to my daughter she said "It looks great so far", suggesting that it didn't look complete. I used round candies to decorate around the cake and made a large Barbie silhouette chocolate transfer for the top.

My personal party supply shopper (my mom) picked up these small disposable wine glasses that were the perfect 'fancy' ice cream cups. Then, I added some adhesive rhinestone trim to the top for some extra sparkle.
DRINKS
Sparkling Cotton Candy


Of course, for my little 'Barbie girl', this wasn't quite enough. She ran into the kitchen to grab a practice gum paste sweet pea I made a few nights ago and used it to garnish her cup.

EXTRAS

My daughter was very proud of the gift opening area that she helped decorate. The pink and gold stool was a gift from the Easter Bunny this year. Smart bunny bringing something that would work perfectly for her party.

And the most important decorations of all.... my daughters artwork she has been making all week to tape up in the entry way.

Thank you for coming to check out my party!

Visit my tutorial for how I made her birthday outfit.


